This post may contain affiliate links. To learn more check my disclosure page.

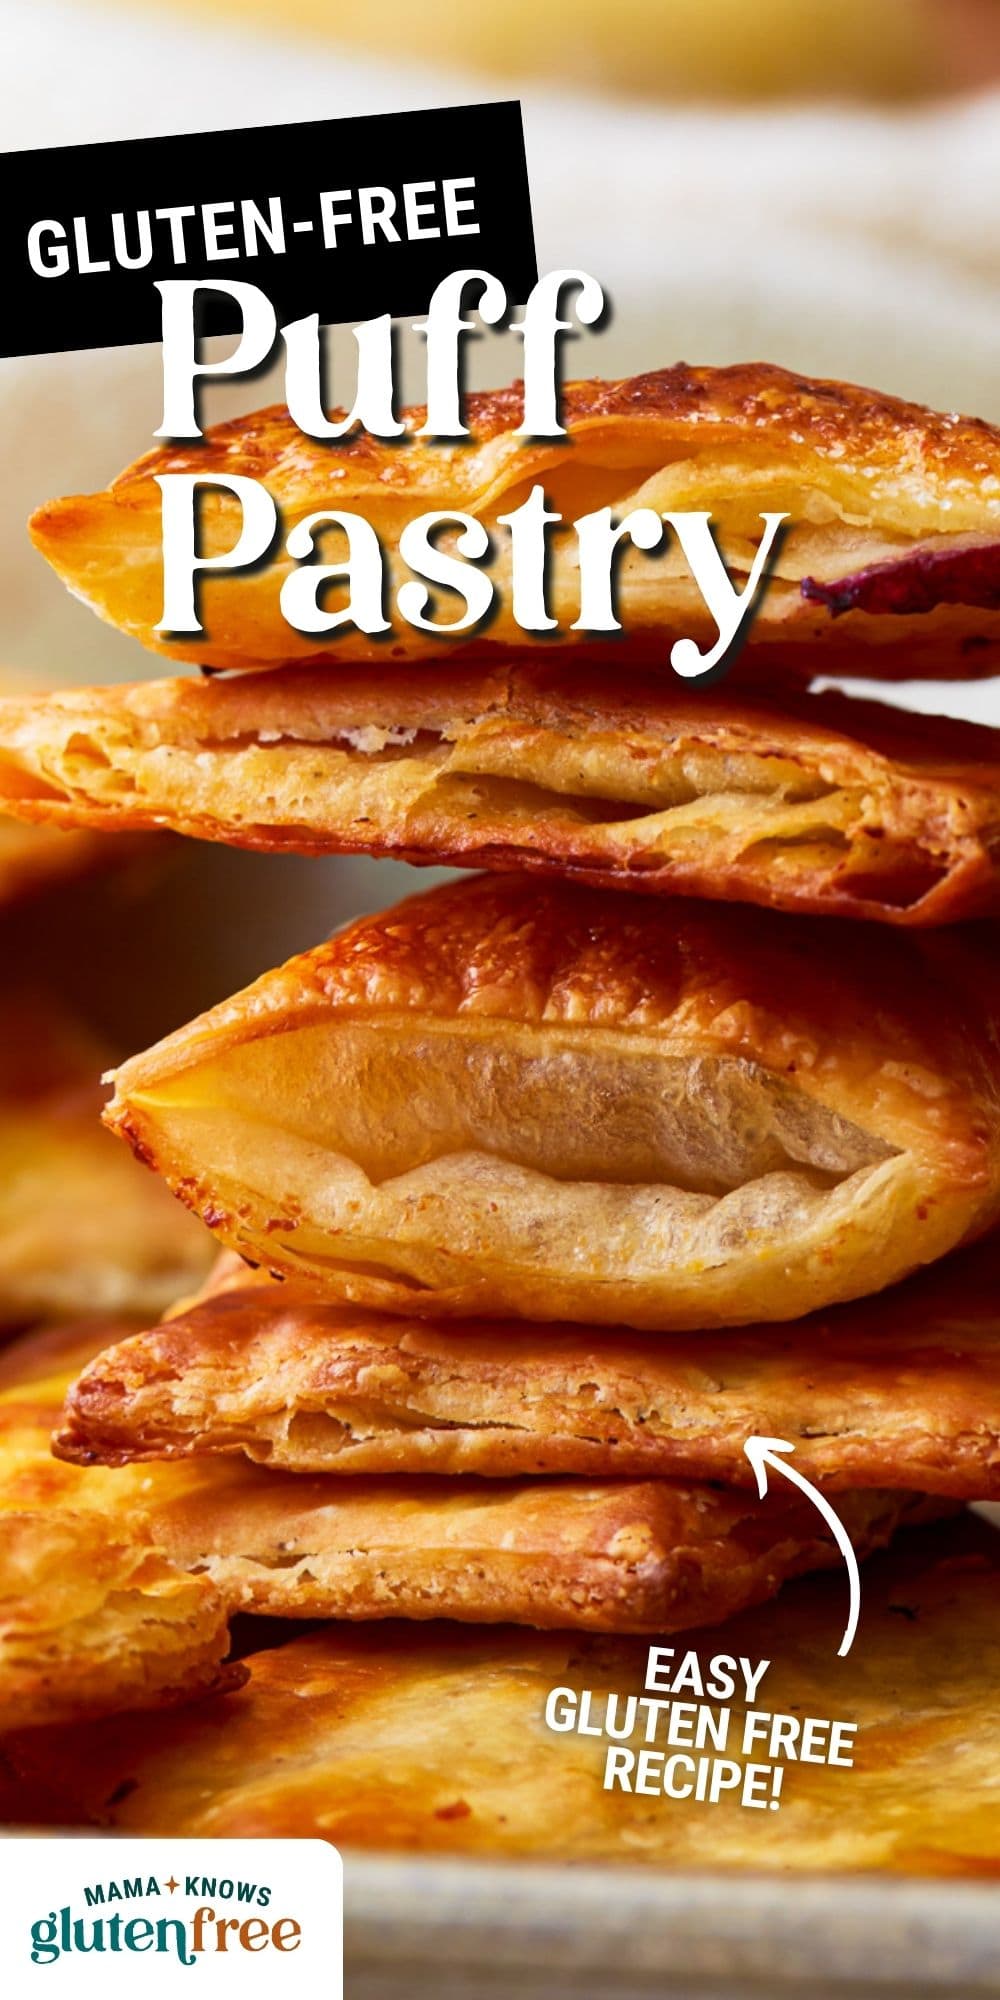

Creating the perfect gluten-free puff pastry made easy with my tried-and-tested recipe! This laminated rough-puff dough bakes beautifully in the oven, creating a buttery, flaky pastry for all your favorite treats. I only use 6 gluten-free pantry staples, and the hands-on time is minimal (mainly rolling and folding—your refrigerator does the rest!) It’s all about keeping the butter cold and using the right amount of gluten-free flour to create those perfect layers.
Gluten-Free Puff Pastry Recipe
I love the challenge of turning my favorite recipes into gluten-free versions. I’ve mastered gluten-free phyllo dough, but puff pastry was always a bit intimidating. I decided to give it a go, and I was pleasantly surprised at how easy it is to make using the rough puff method! Gluten-free flour and xantham gum make a flexible dough that rolls and folds without falling apart. I also use cold, unsalted butter cut into small cubes and slices to create the classic flaky layers. When folded and rolled out just right, the pastry bakes up to golden perfection!
This gluten-free rough puff pastry is so simple to create, and my step-by-step photos below will guide you through the process.
Ingredients
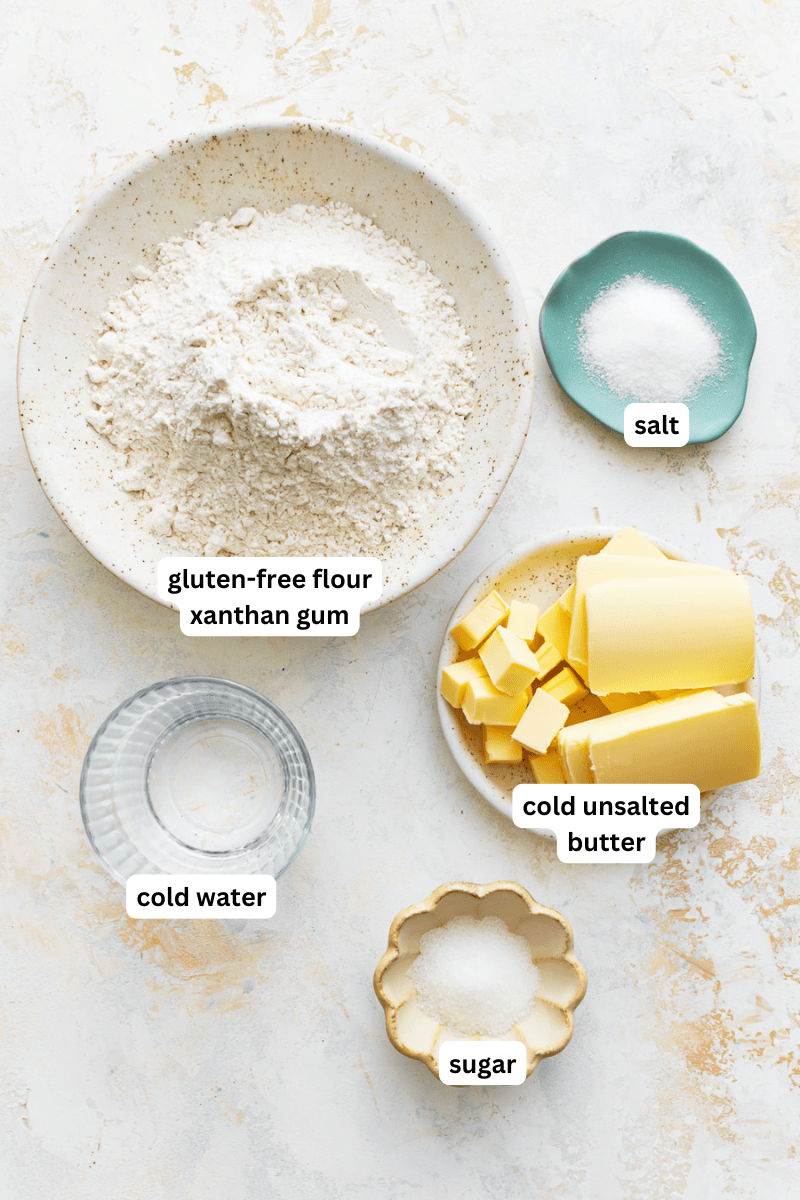
- All-Purpose Gluten-Free Flour: Traditional puff pastry uses wheat-based flour, meaning it contains gluten. To keep this recipe gluten-free, I recommend using a high-quality, all-purpose gluten-free flour blend. Don’t substitute the all-purpose blend with coconut flour or almond flour—they won’t give the same results.
- Xanthan Gum: This acts as a binder and gives the dough elasticity. If your all-purpose gluten-free flour already contains xantham gum, you can omit it.
- Sugar: Just enough to help the dough crisp and turn golden during baking. It won’t make the dough overly sweet.
- Salt: For added flavor.
- Cold Unsalted Butter: Your butter must be cold for this recipe to work. You don’t need to freeze the butter, but it must be chilled in the refrigerator before using. I cut my butter into two shapes: small cubes and thin slices. The cubes are cut into the dry ingredients, while the slices are layered in the first fold during the ‘lamination’ process. This creates those flaky layers we all love!
- Cold Water: Helps bring the gluten-free pastry dough together.
Tips and Suggestions
- When kneading, the dough should come together into a smooth ball and hold its shape when gently pressed. It shouldn’t be too sticky or too dry. Different flour brands may require slightly different amounts of liquid, so adjust with additional water or flour if needed.
- Stop kneading once the dough comes together into a smooth ball. Otherwise, you risk the butter melting from the heat of your hands.
- Make sure your ingredients stay cold during the folding and rolling process! Refrigerate the dough if the butter starts melting or the dough feels soft. You should see flecks of butter throughout the dough after each fold and roll.
- Dust your work surface with gluten-free flour to prevent sticking! I also lay a piece of plastic wrap on my work surface before flouring to help with sticking.
- This recipe makes one large gluten-free puff pastry sheet. Use it as directed in your desired recipe, or cut the sheet into smaller pieces and freeze for later (see below for storage instructions).
What Is Laminated Dough?
I’ve mentioned the words ‘laminating’ and ‘laminated’ a few times now, but I realize not everyone will be familiar with this term! Laminated dough is a technique used in pastry making where layers of butter or fat are folded into the dough. Essentially, you roll out the dough, place a thin layer of butter on top, fold it over itself, roll it out again, and repeat.
In this recipe, I use the rough puff method of lamination. Instead of using a solid block of butter and performing multiple folds with chilling times in between, I use larger chunks of butter and skip the chilling time between folds. This method still creates a flaky homemade gluten-free puff pastry—it’s just simplified to save time and effort!
Why Do I Need to Keep the Ingredients Cold?
Using cold water helps the butter stay solid while you’re working with it. Those solid butter pieces will then melt in the oven and produce steam, which creates the puffy layers. Warm ingredients won’t achieve the same flaky results.
Why Is My Pastry Not Puffing Up?
This recipe for gluten-free puff pastry requires precise handling and temperature control. Ensure that your ingredients are cold, avoid overworking the dough, and follow the folding and chilling steps carefully for optimal results.
What to Make With Gluten-Free Puff Pastry
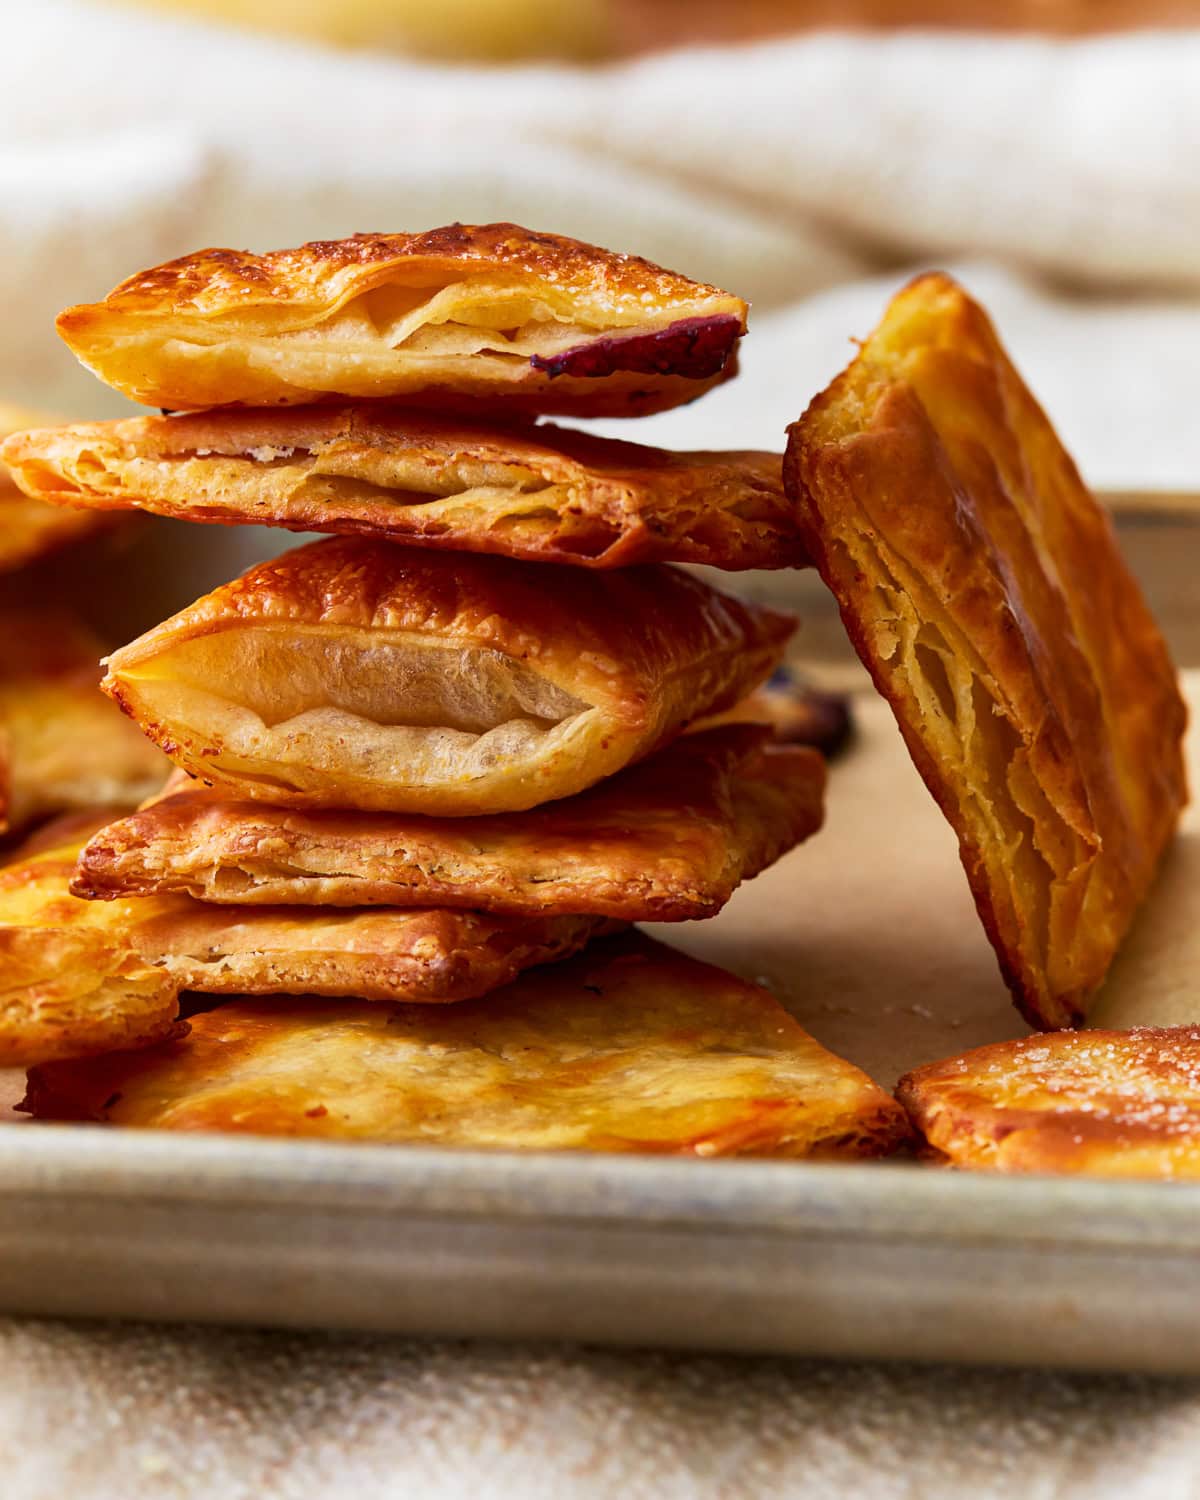
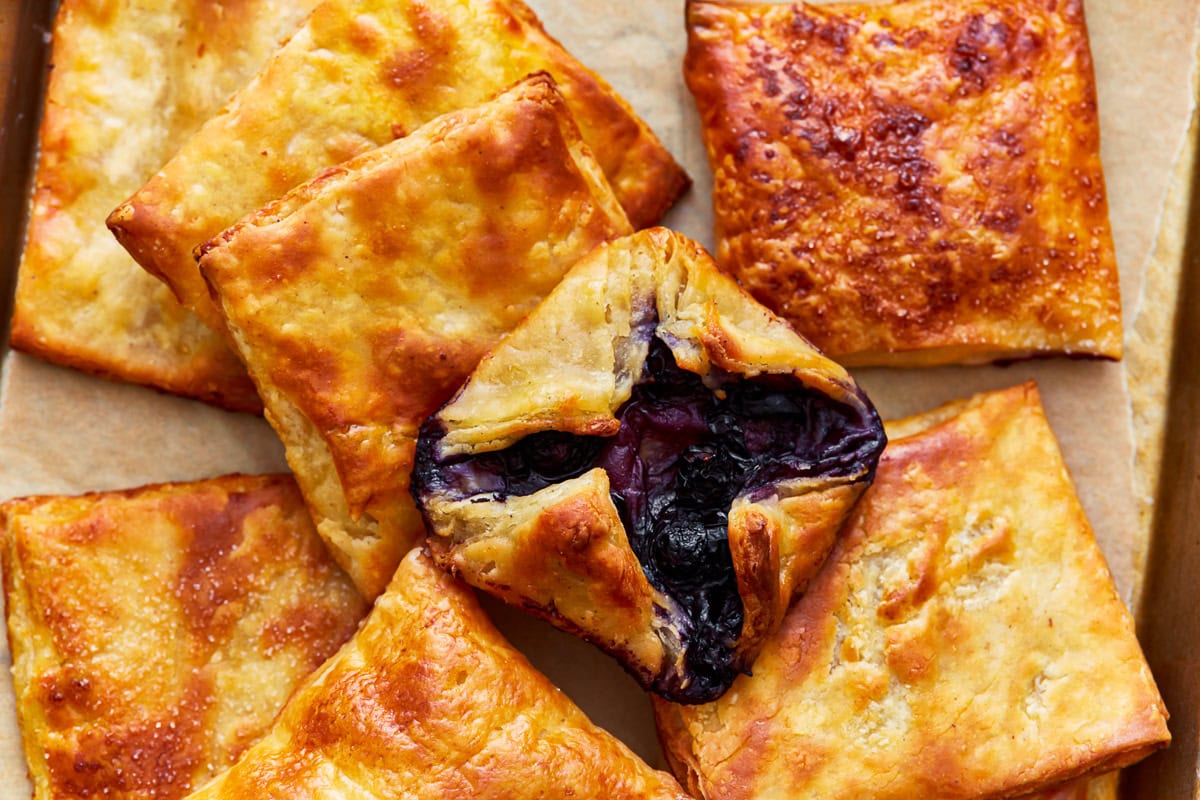
I love making homemade pastries and puffs with this recipe! I made a simple blueberry pastry in these photos, but you can make whatever sweet or savory dishes you like. Here are some delicious ideas:
- Fill with your favorite jam and cream cheese to make a gluten-free Danish
- Use as a crust for gluten-free quiche or savory tarts
- Try this pastry in my gluten-free croissant recipe
- Replace the crust in our gluten-free chicken pot pie
- Make mini hand pies filled with vegetables and meat (like these gluten-free empanadas)
- Create homemade gluten-free pop tarts
- Get festive with this gluten-free baked brie
- Use as a buttery alternative to gluten-free pizza dough
Storage Instructions
Store rolled-out GF puff pastry dough in the refrigerator if you plan to use it later. Layer the rolled-out dough between sheets of parchment paper, wrap it tightly in plastic wrap, and refrigerate for up to 2 days. You can also freeze this recipe! After wrapping the dough in plastic wrap, place it in a freezer-safe bag or container and freeze for up to 3 months. Thaw overnight in the refrigerator before using.

More Gluten-Free Pastry Recipes to Try!
- Gluten-Free Phyllo Dough / Filo Pastry
- Gluten-Free Pie Crust
- Gluten-Free Crescent Rolls
- Gluten-Free Apple Pie
Gluten-Free Puff Pastry Recipe

Ingredients
- 2 cups all-purpose gluten-free flour blend, plus extra for flouring the work surface
- 1 teaspoon xanthan gum, omit if your blend already contains it
- 1 tablespoon granulated sugar
- 1 teaspoon salt
- 3 tablespoons cold unsalted butter, cubed
- ½ cup cold water, from the refrigerator
- ⅔ cup cold unsalted butter, cut into thin slices
Instructions
- In a large mixing bowl, combine the gluten-free flour, xanthan gum (if needed), sugar, and salt.
- Add the cubed cold unsalted butter to the flour mixture. Using a pastry cutter or your fingertips, work the butter into the flour until it resembles coarse crumbs.
- Gradually add the cold water to the mixture, stirring with a fork until the dough begins to come together.
- Turn the dough out onto a lightly floured work surface and gently knead it until it forms a smooth ball.
- Flatten the dough into a rectangle, then wrap it tightly in plastic wrap and refrigerate for at least 30 minutes.
- Once chilled, remove the dough from the refrigerator and place it on a floured surface.
- Roll the dough out into a large rectangle, about 1/4 inch thick.
- Arrange the cold unsalted butter cut into thin slices evenly over two-thirds of the dough, leaving one-third of the dough without butter.
- Fold the unbuttered third of the dough over the middle third.
- Then, fold the remaining third over the top to create three layers.
- Rotate the dough 90 degrees, then roll it out into another large rectangle.
- Repeat the folding process by folding one third over the middle.
- Finally, fold the remaining third over once again to create three layers.
- Roll out the dough into a large rectangle again.
- Wrap the dough tightly in plastic wrap and refrigerate for at least 30 minutes before using in your desired recipe. (I sliced mine into squares to make little pastries).
Notes
- Make sure your butter and water are cold for the best results.
- Don’t overwork the dough; otherwise, the butter will soften, and the pastry won’t puff up in the oven.
- To Store: Wrap in plastic wrap and refrigerate for up to 2 days.
- To Freeze: Once wrapped in plastic wrap, place the dough into a freezer-safe bag/container and freeze for up to 3 months.
- Mama says, “Check all of your labels.”
Nutrition
Nutrition information is automatically calculated, so should only be used as an approximation.
How to Make Gluten-Free Puff Pastry Step-by-Step
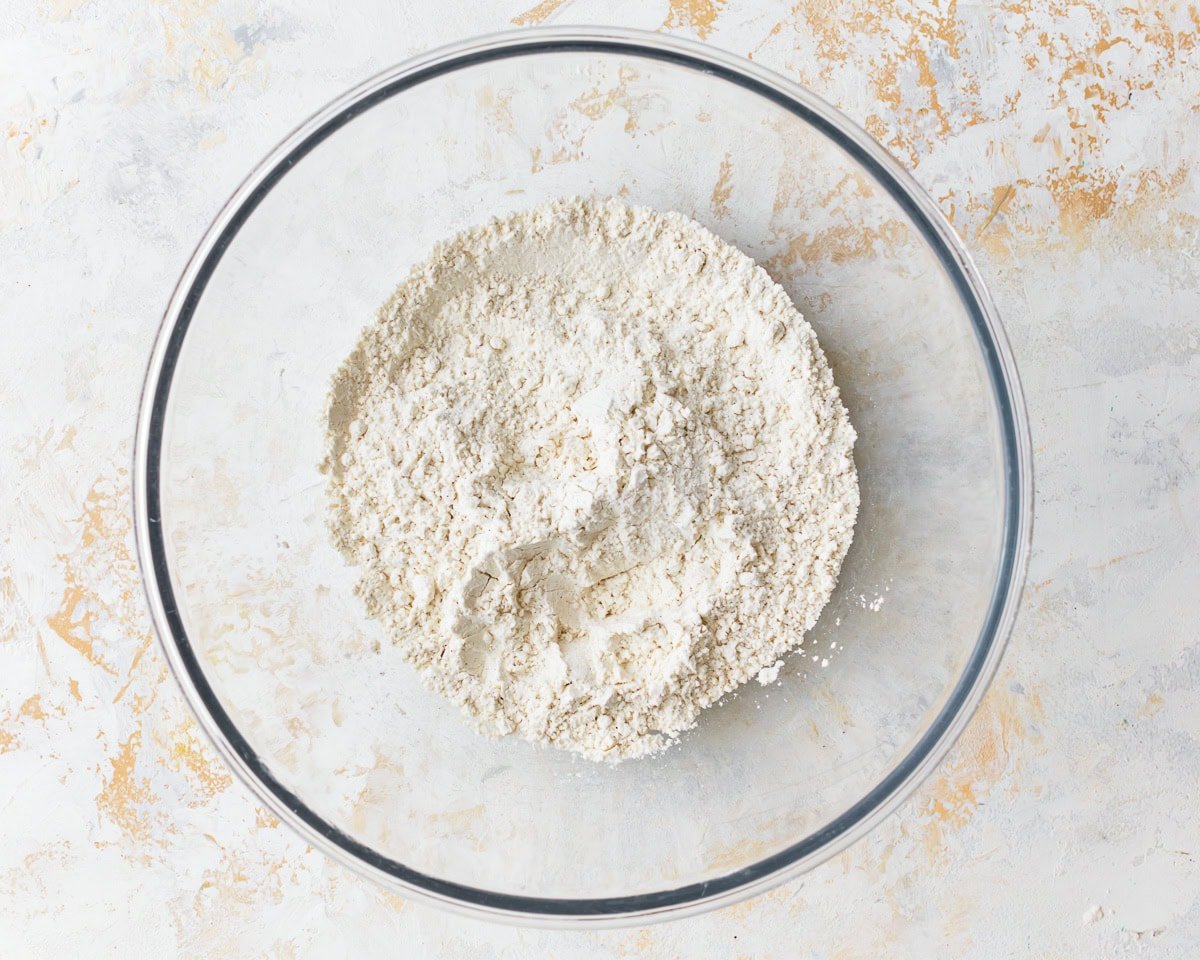
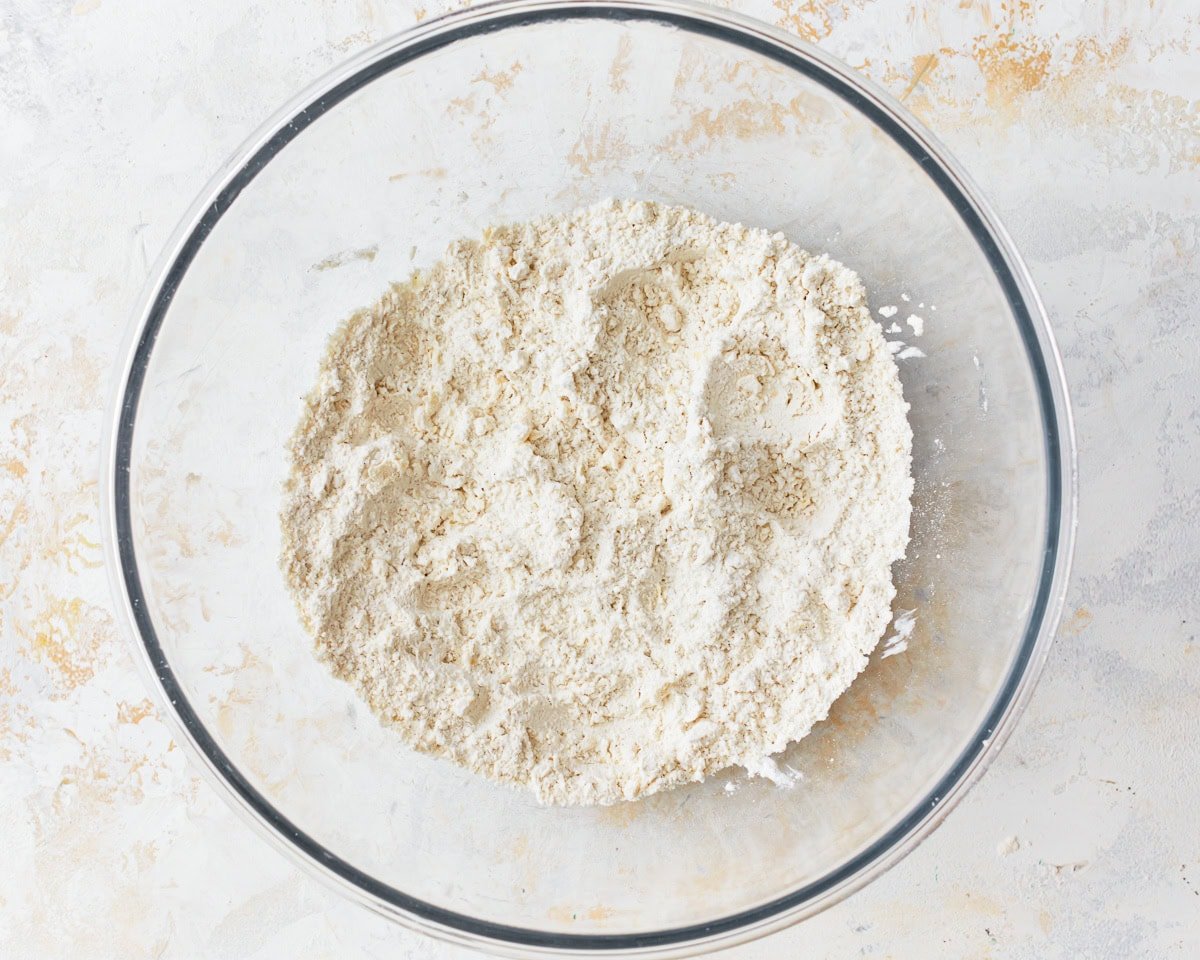
In a large mixing bowl, combine 2 cups gluten-free flour, 1 teaspoon xanthan gum (if needed), 1 tablespoon sugar, and 1 teaspoon salt.
Add 3 tablespoons cubed cold unsalted butter to the flour mixture. Using a pastry cutter or your fingertips, work the butter into the flour until it resembles coarse crumbs.
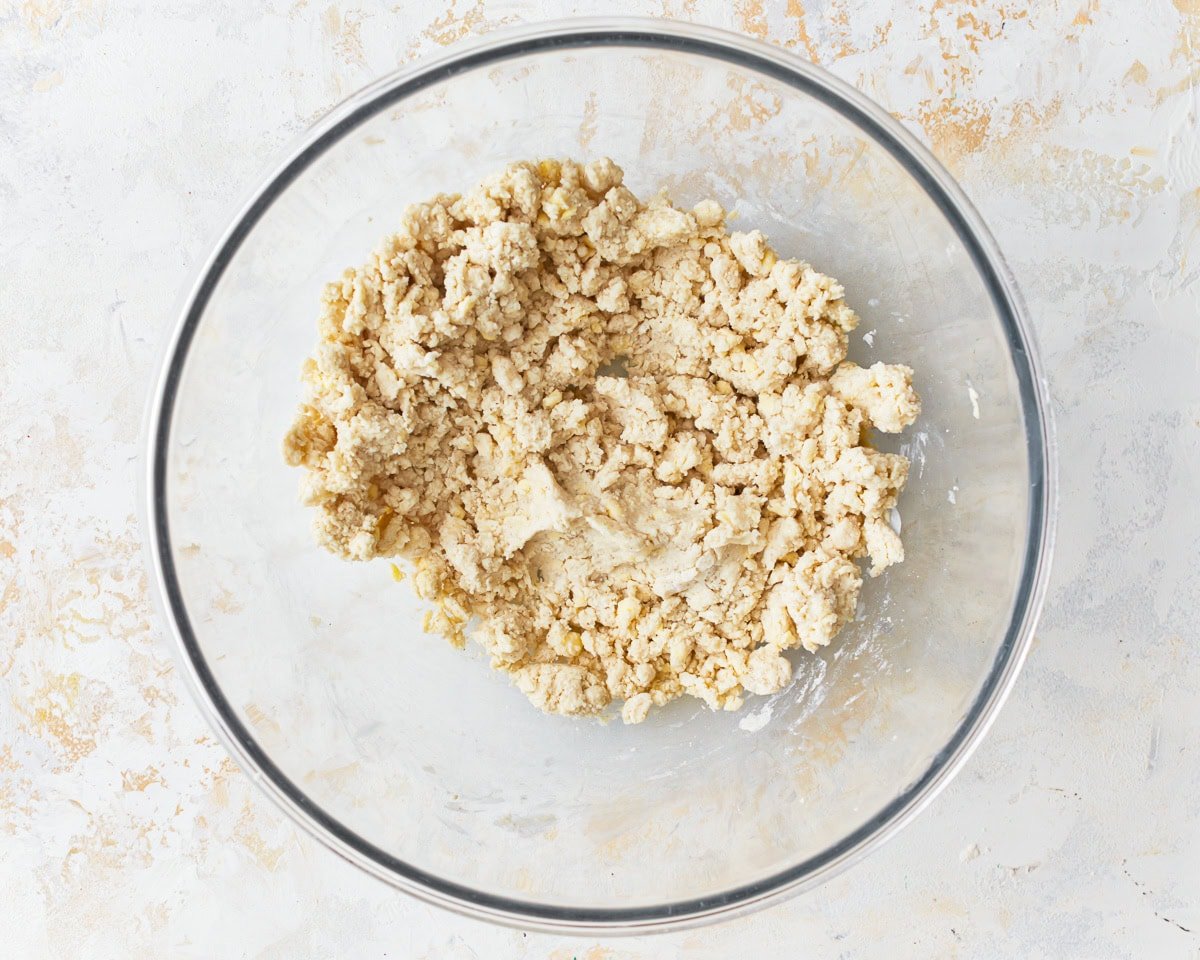
Gradually add ½ cup cold water to the mixture, stirring with a fork until the dough begins to come together.
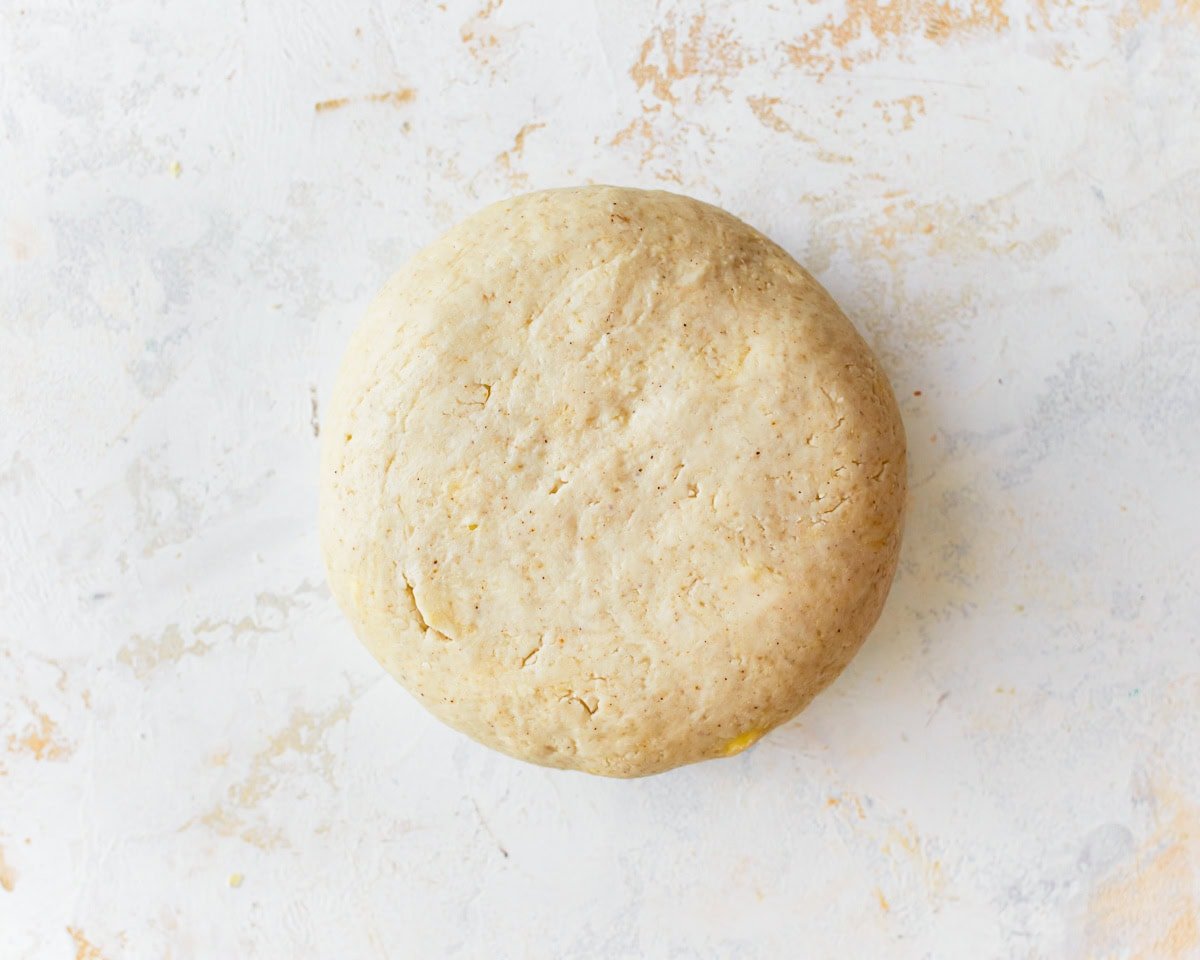
Turn the dough out onto a lightly floured work surface and gently knead it until it forms a smooth ball.
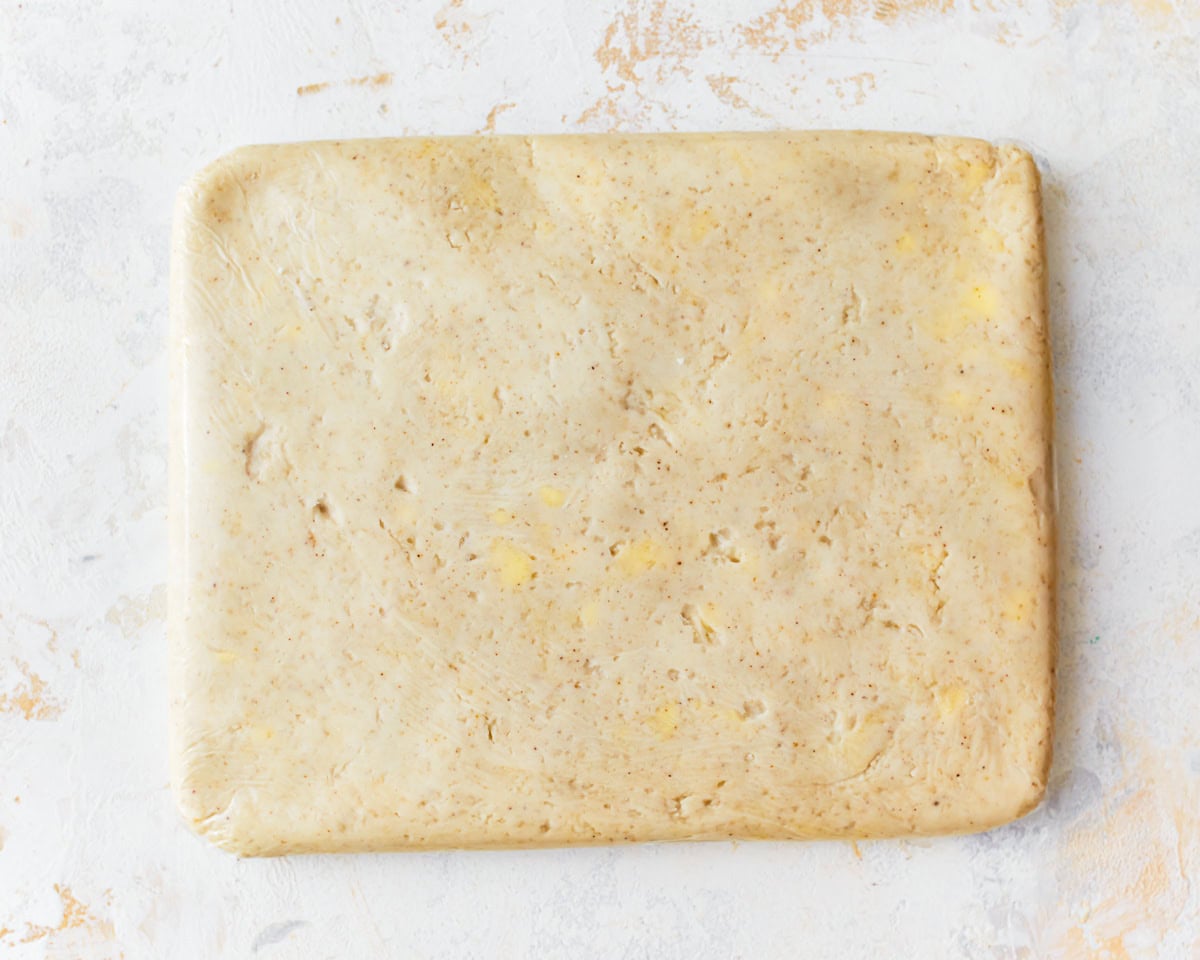
Flatten the dough into a rectangle, then wrap it tightly in plastic wrap and refrigerate for at least 30 minutes.
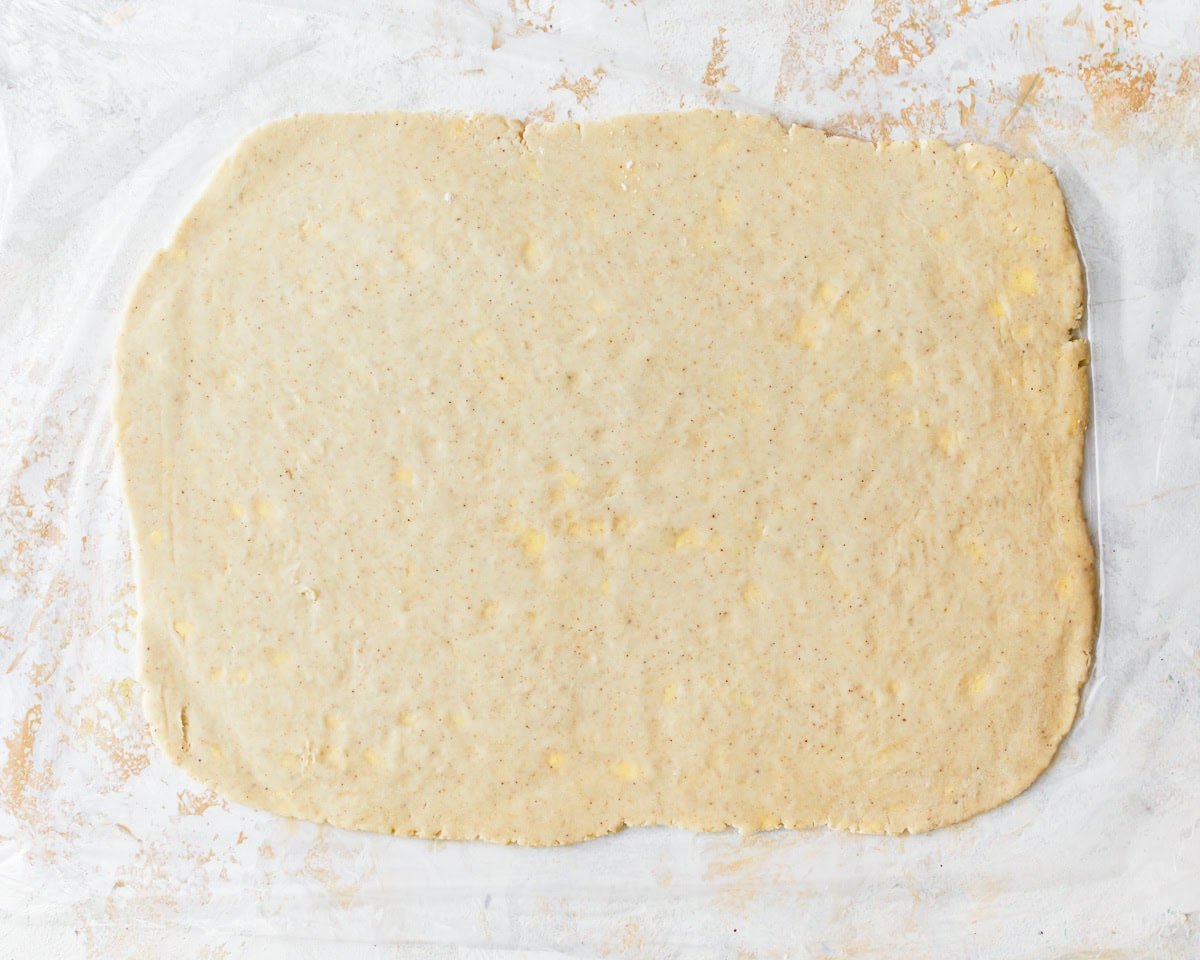
Once chilled, remove the dough from the refrigerator and place it on a floured surface. Roll the dough out into a large rectangle, about 1/4 inch thick.
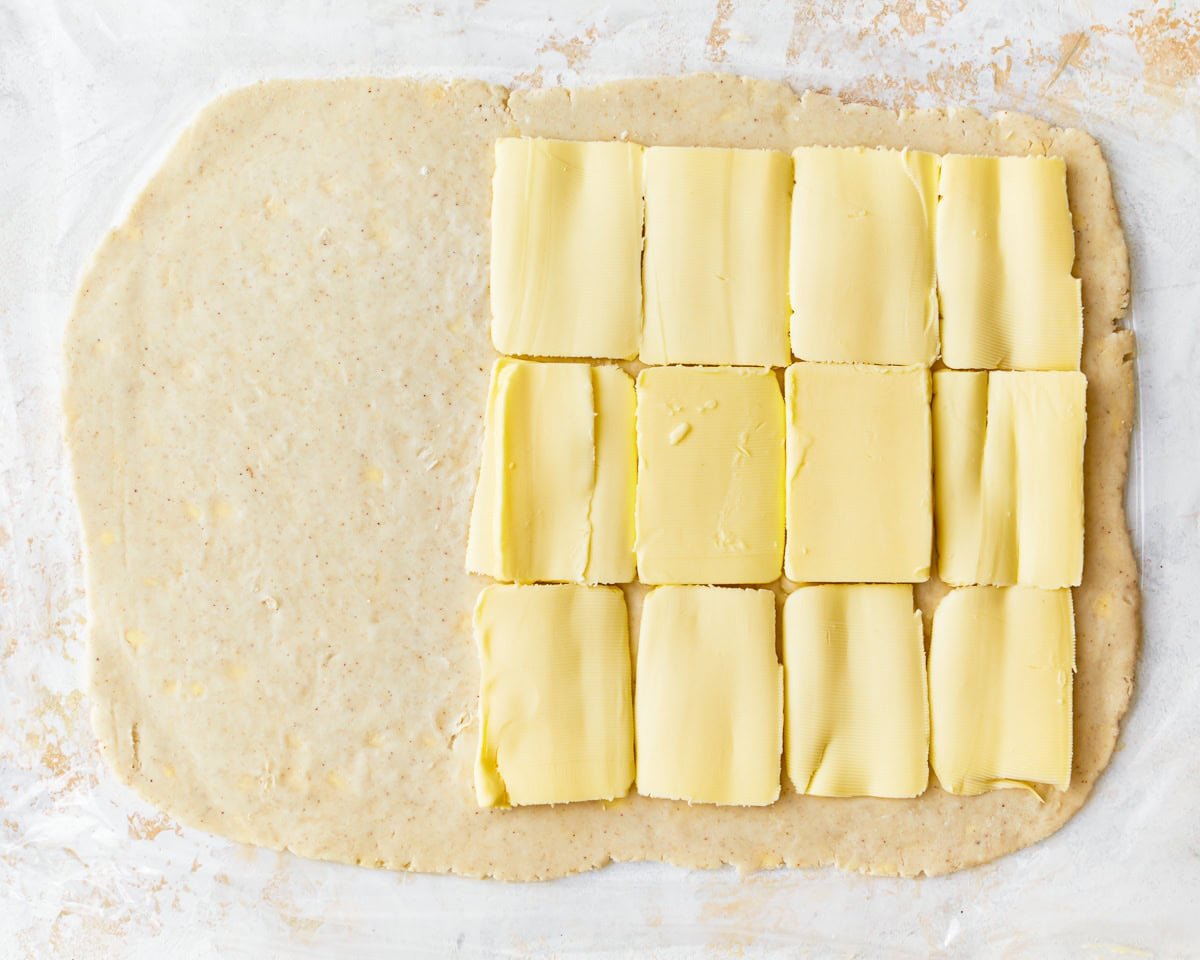
Arrange ⅔ cup cold unsalted butter cut into thin slices evenly over two-thirds of the dough, leaving one-third of the dough without butter.
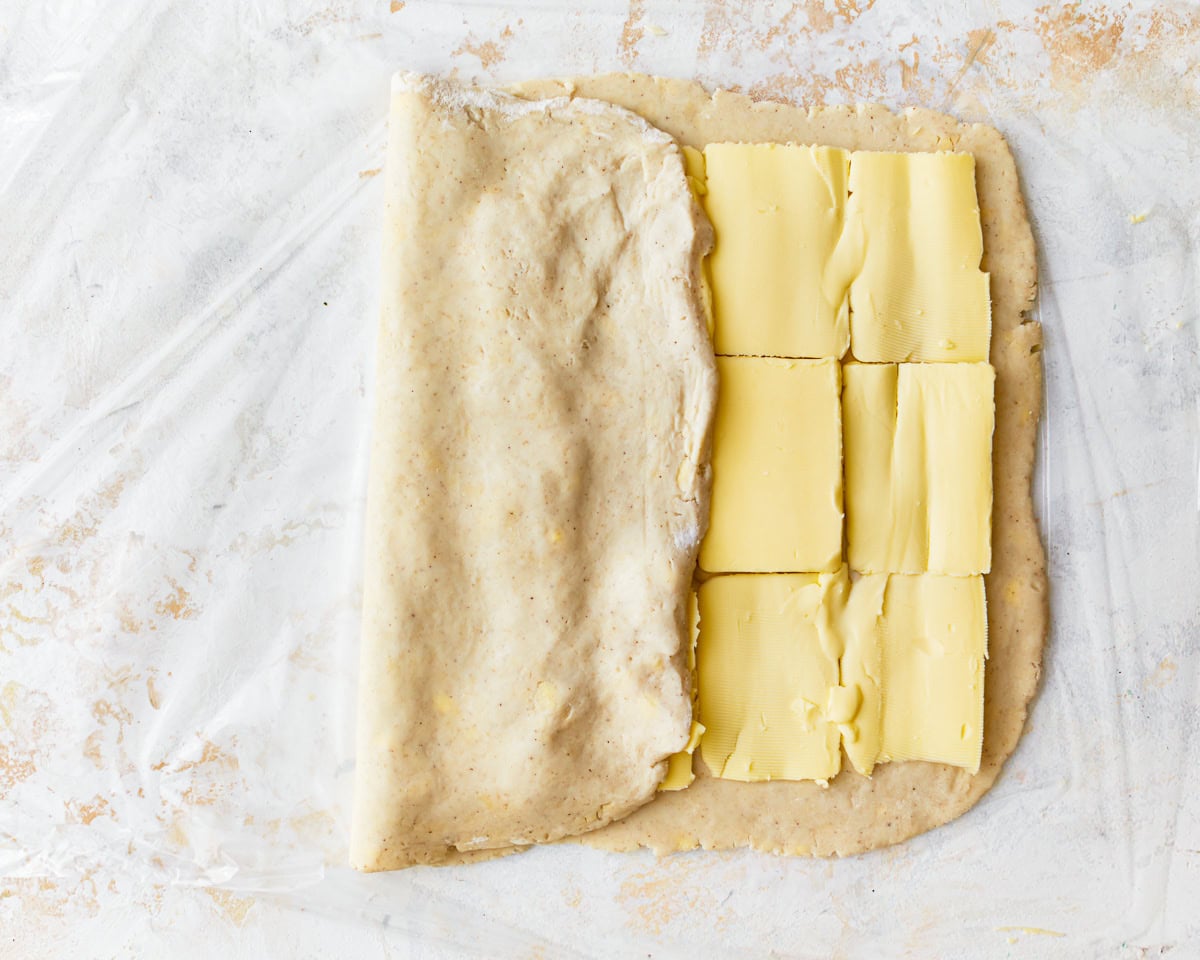
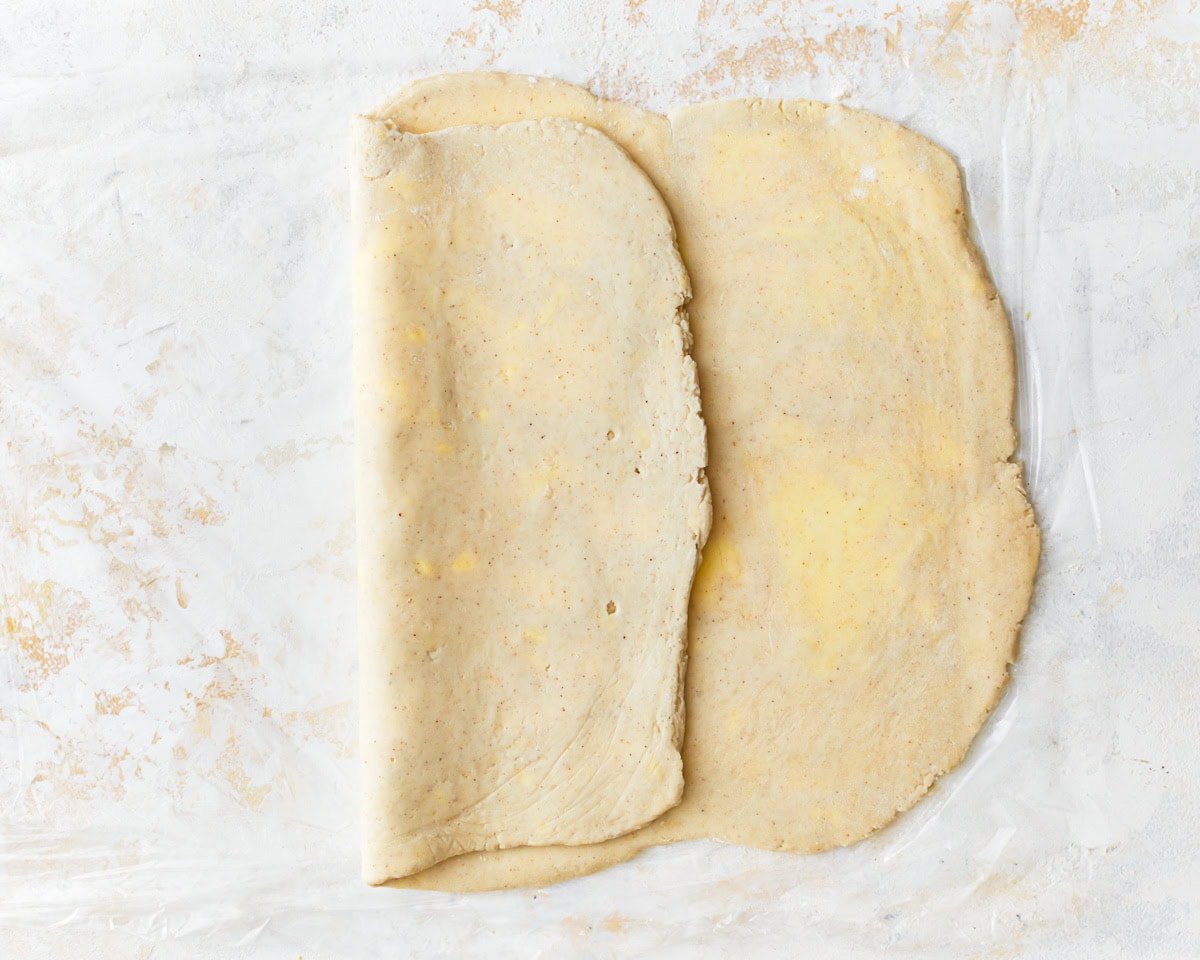
Fold the unbuttered third of the dough over the middle third.
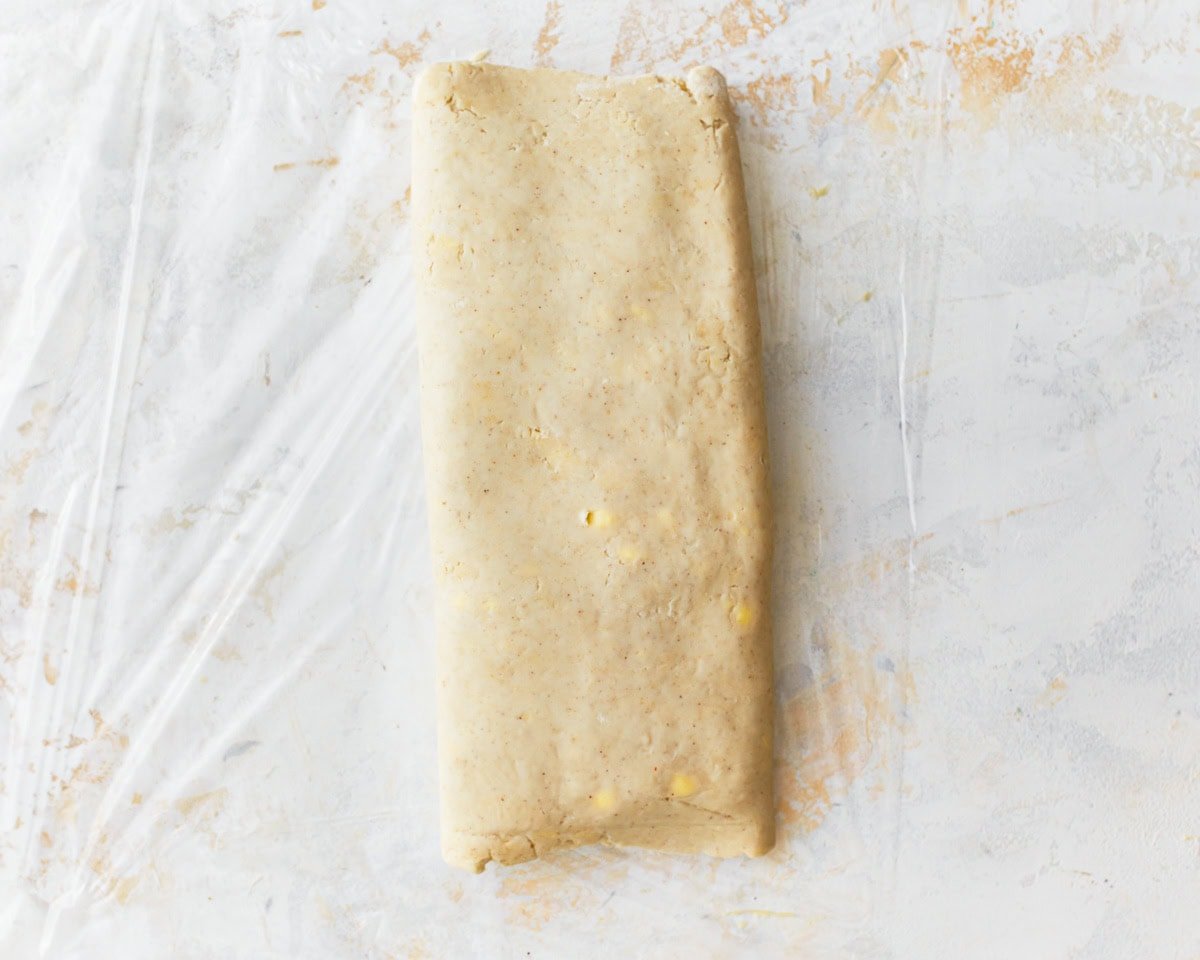
Then, fold the remaining third over the top to create three layers.

Rotate the dough 90 degrees, then roll it out into another large rectangle.
Repeat the folding process by folding one third over the middle.
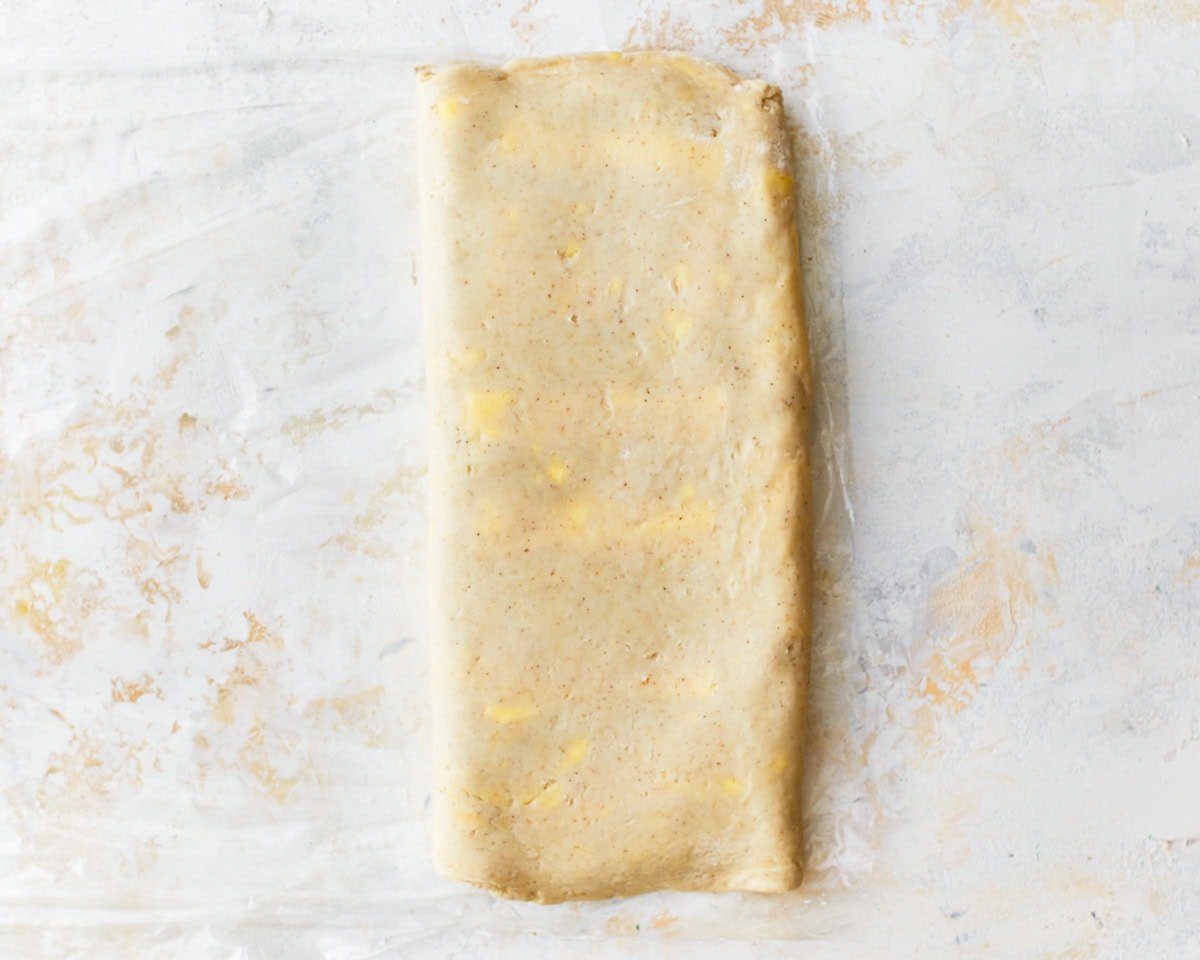
Finally, fold the remaining third over once again to create three layers.
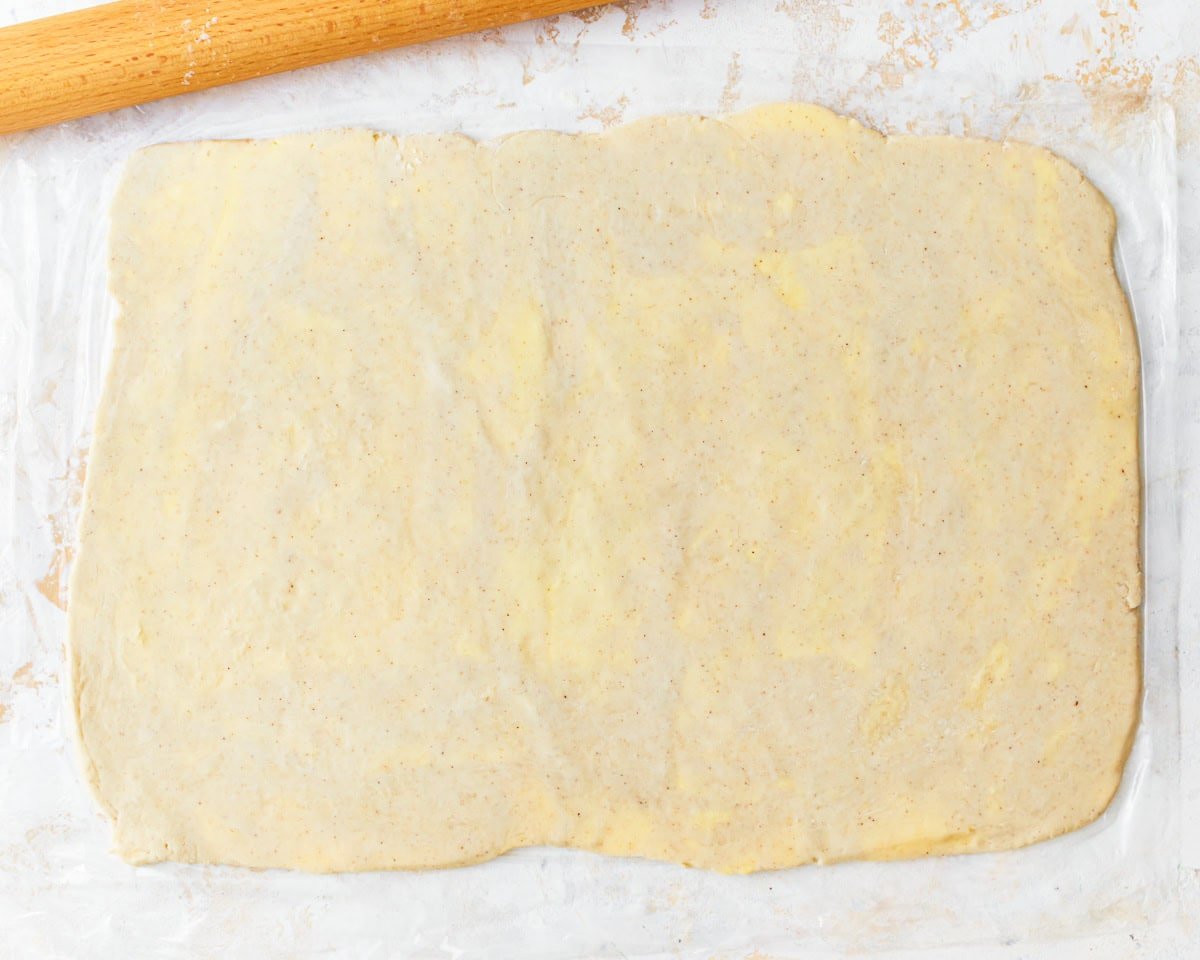
Roll out the dough into a large rectangle again.

Wrap the dough tightly in plastic wrap and refrigerate for at least 30 minutes before using in your desired recipe. (I sliced mine into squares to make little pastries).